Justin Ma's Notes on Traditional Chinese Archery
Please visit thewayofarchery.com for more info about our Ming-Chinese Military Archery system. You are also welcome to contact me at thewayofarchery@gmail.com.
Introduction
A desire to renew the connection with my heritage is one of the main reasons that I pursued traditional Chinese archery starting December 2009. The other reasons are that I enjoy the bare bones challenge, as traditional Chinese archery has no need for the shelves, sights and stabilizers used in modern archery. And I enjoy continually learning new things about this art, whether it's a new archaeological discovery that sheds light on what ancient Chinese bows and arrows looked like, or whether it's an "Aha!" moment in practice. Finally, I enjoy the intrinsic diversity of Chinese archery, as it encompasses many styles of equipment (bows, arrows, etc) and schools of thought.
I'd like these notes to serve as a starting reference (with external pointers to more in-depth resources) for those who are interested in beginning traditional Chinese archery. Originally, very few people taught Chinese style in the US, I struggled early to find the right learning resources. I hope these notes can point beginners to the right places so they can find a more direct path to enjoying this martial art.
Other styles of Asian archery (for example, Mongolian, Tibetan, Korean, Japanese, Turkish, Arabian, Persian) have a lot in common with the Chinese style, but they also have their own unique characteristics. If you're interested in learning more about other Asian styles, I encourage you to visit the links provided in the background section. You may still find my equipment recommendations useful.
Table of Contents
Background
Archery was thoroughly embedded in Chinese culture and history for thousands of years, permeating legends, rituals and military practices. It was one of the Six Noble Arts as early as the Zhou period, and Confucius himself was an archery teacher. Archery was easily the most prestigious of the martial arts, as the author of Wu Bei Zhi (a famous Ming Dynasty military encyclopedia) wrote: "The bow is the primary among all weapons, so those who write of military affairs write first about bows and arrows." Yet despite its rich history, traditional Chinese archery was on the brink of extinction in the 20th century.
However in the 21st century, the art is experiencing a revival thanks to the determined efforts of craftsmen, researchers, promoters and enthusiasts.
For an in-depth discussion of archery traditions in Chinese history and culture, Stephen Selby's "Chinese Archery" is a great reference.
The ATARN site features nice articles on Asian archery, and the ATARN forum has a lot of friendly, knowledgeable people willing to answer your questions. China Archery is a blog featuring a nice variety of articles on Chinese archery. Finally, the Chinese Archery Wikipedia article provides a high-level summary.
Technique
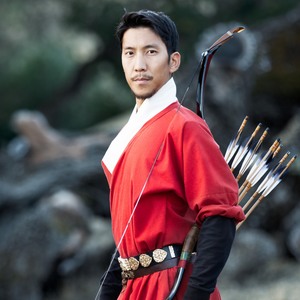
Here are quick videos of me and other folks shooting in the traditional Chinese style:
My current technique is derived from Gao Ying's books, which date to 1637 AD. Gao Ying was an archery teacher from the late Ming dynasty. However, there is no such thing as a "standard" way to practice Chinese archery --- there exist many variations that differ in philosophy, mental approach, whether to follow through with the bow/draw hands, how high to anchor the arrow during the draw, how far to draw the bow, and so on. Nonetheless, all these variations have shared, fundamental characteristics:
- Thumb draw

The Chinese most commonly used the thumb draw, as did many Asian peoples such as the Mongolians, Koreans, Japanese, Turks, Arabs, and in later periods the Indians and Persians. Even the Romans used the thumb draw. However, during earlier times (e.g., the Zhou dynasty archery rituals), the 3-finger draw was popular at the same time as the thumb draw. The rest of these notes will discuss technique related to the thumb draw.
- Nocking the arrow without looking at your hand
This way, you can focus your attention on the target (especially important while riding on horseback). Getting the "correct" feather orientation becomes less important because the emphasis is nocking the arrows quickly.
- Proper body alignment
Good, strong posture is important. This is a martial art, after all.
- Focus on the target
There are two systems of aiming that are primarily practiced in Chinese archery, both of which emphasize placing focal vision on the target. Of course for any system of aim to work, your physical form must be consistent.
The first is Instinctive. You have to feel the force vector in your body and between your hands, coordinating it with your vision. With a lot of practice, your body and eyes can get used to this method of aim. Once you've achieved painstaking mastery, Instinctive is the most versatile aiming system and can be applied to any situation.
The second is Split Vision. Focal vision is on the target, and peripheral (fuzzy) vision is on the arrow, arrowhead, or bow handle (or some combination of the three). You note the offset between the objects in your peripheral vision against the target in your focal vision, you can adjustyour aim to place the arrow in different locations. With additional training, you worry less about what you see in the periphery, and your Split Vision eventually evolves into Instinctive aim.
Of course, you will want to try shooting at a variety of distances to improve your aiming. Another great way to develop aim is by shooting on field archery trails, which have targets at a variety of elevations. Dynamic exercises such as shooting while walking or hopping on one leg will also develop intuition (and force you to improve your arrow nocking ability). After all, shooting from horseback is far from a stationary activity, and hunting for food almost never involves pre-marked distances.
- Emphasis on mental focus
This is pretty self-explanatory. :)
The above-mentioned tutorial videos are a great starting point for picking up technique.
I used to believe that the "Chinese" draw length had to be long. But it turns out that a huge variety of draw lengths from very short (draw hand near the front shoulder) to very long (draw hand well past the face) were used over time in China. My current draw length is actually 28" measured to the back (far side) of the bow handle. I size my arrow a little longer (by 7/8") to help avoid overdraw and so that my thumb can touch the back of the arrowhead. Ultimately, the ideal draw length for each person will be different, so you will have to explore what is comfortable and accurate for you.
Equipment
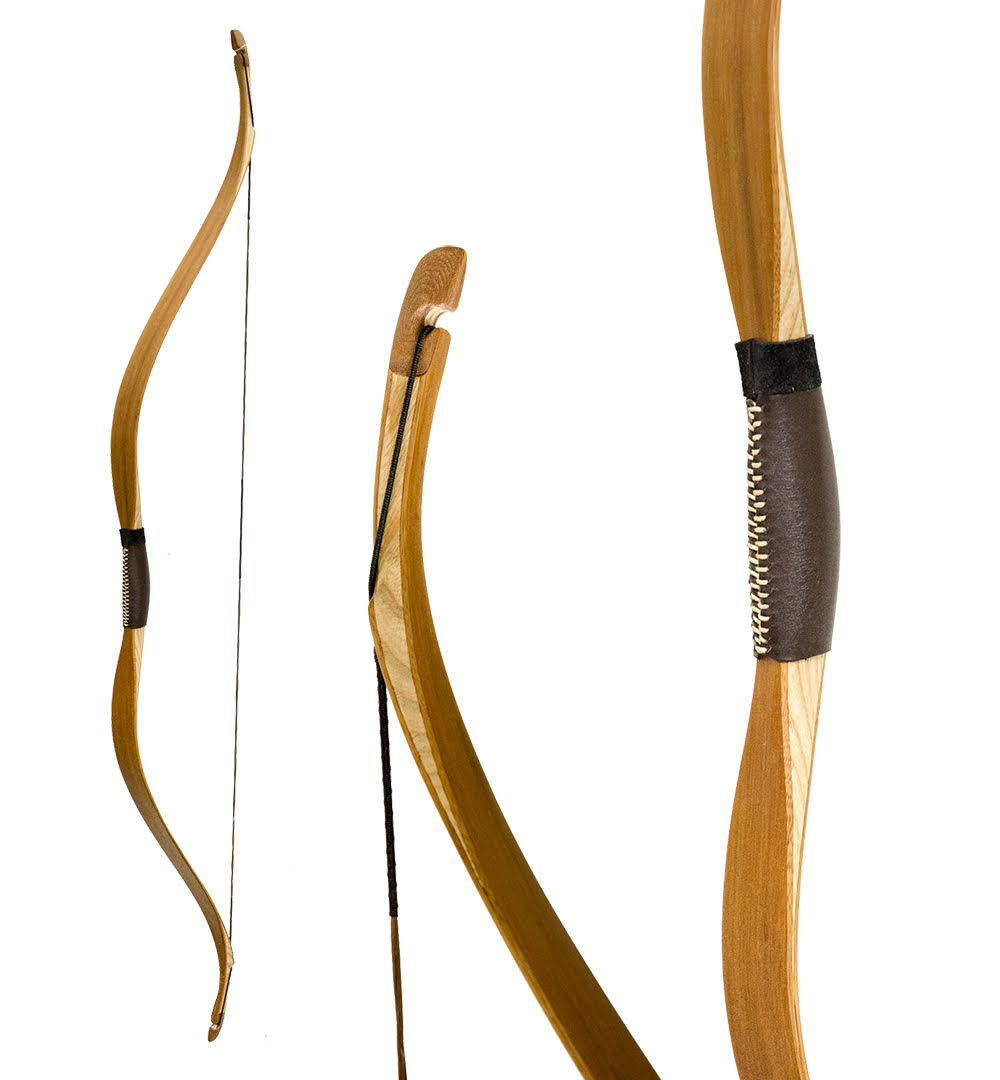
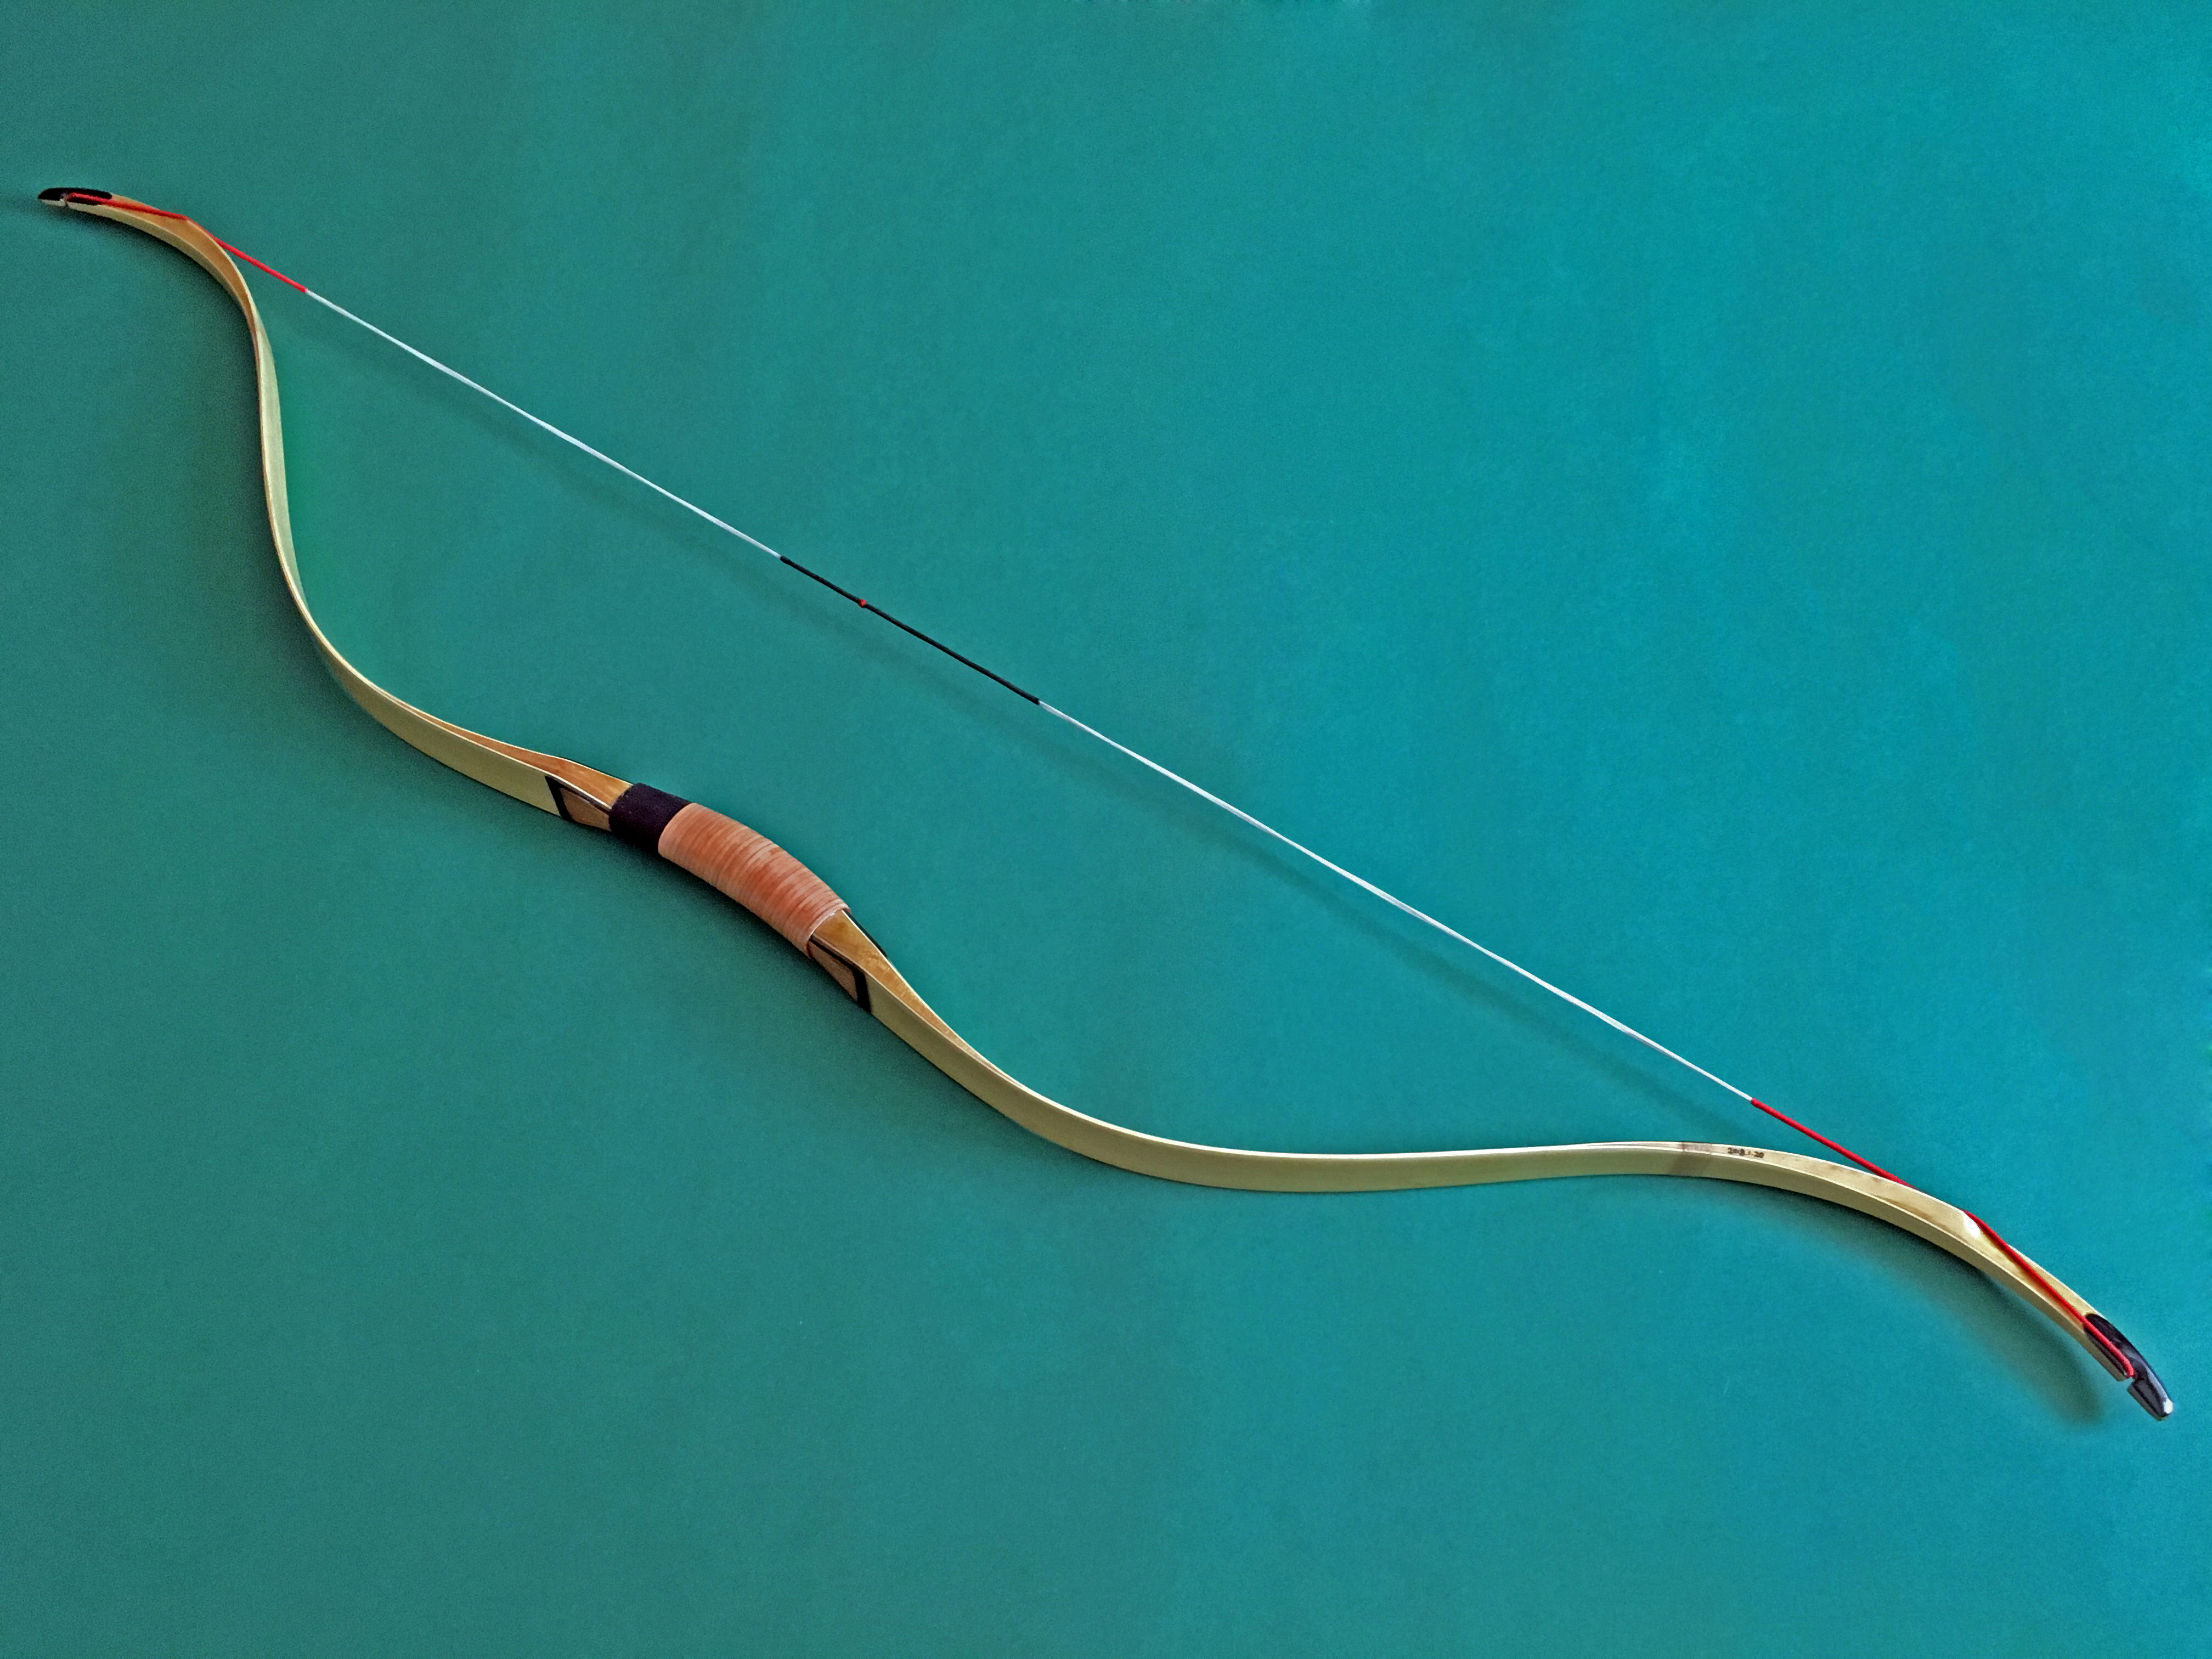
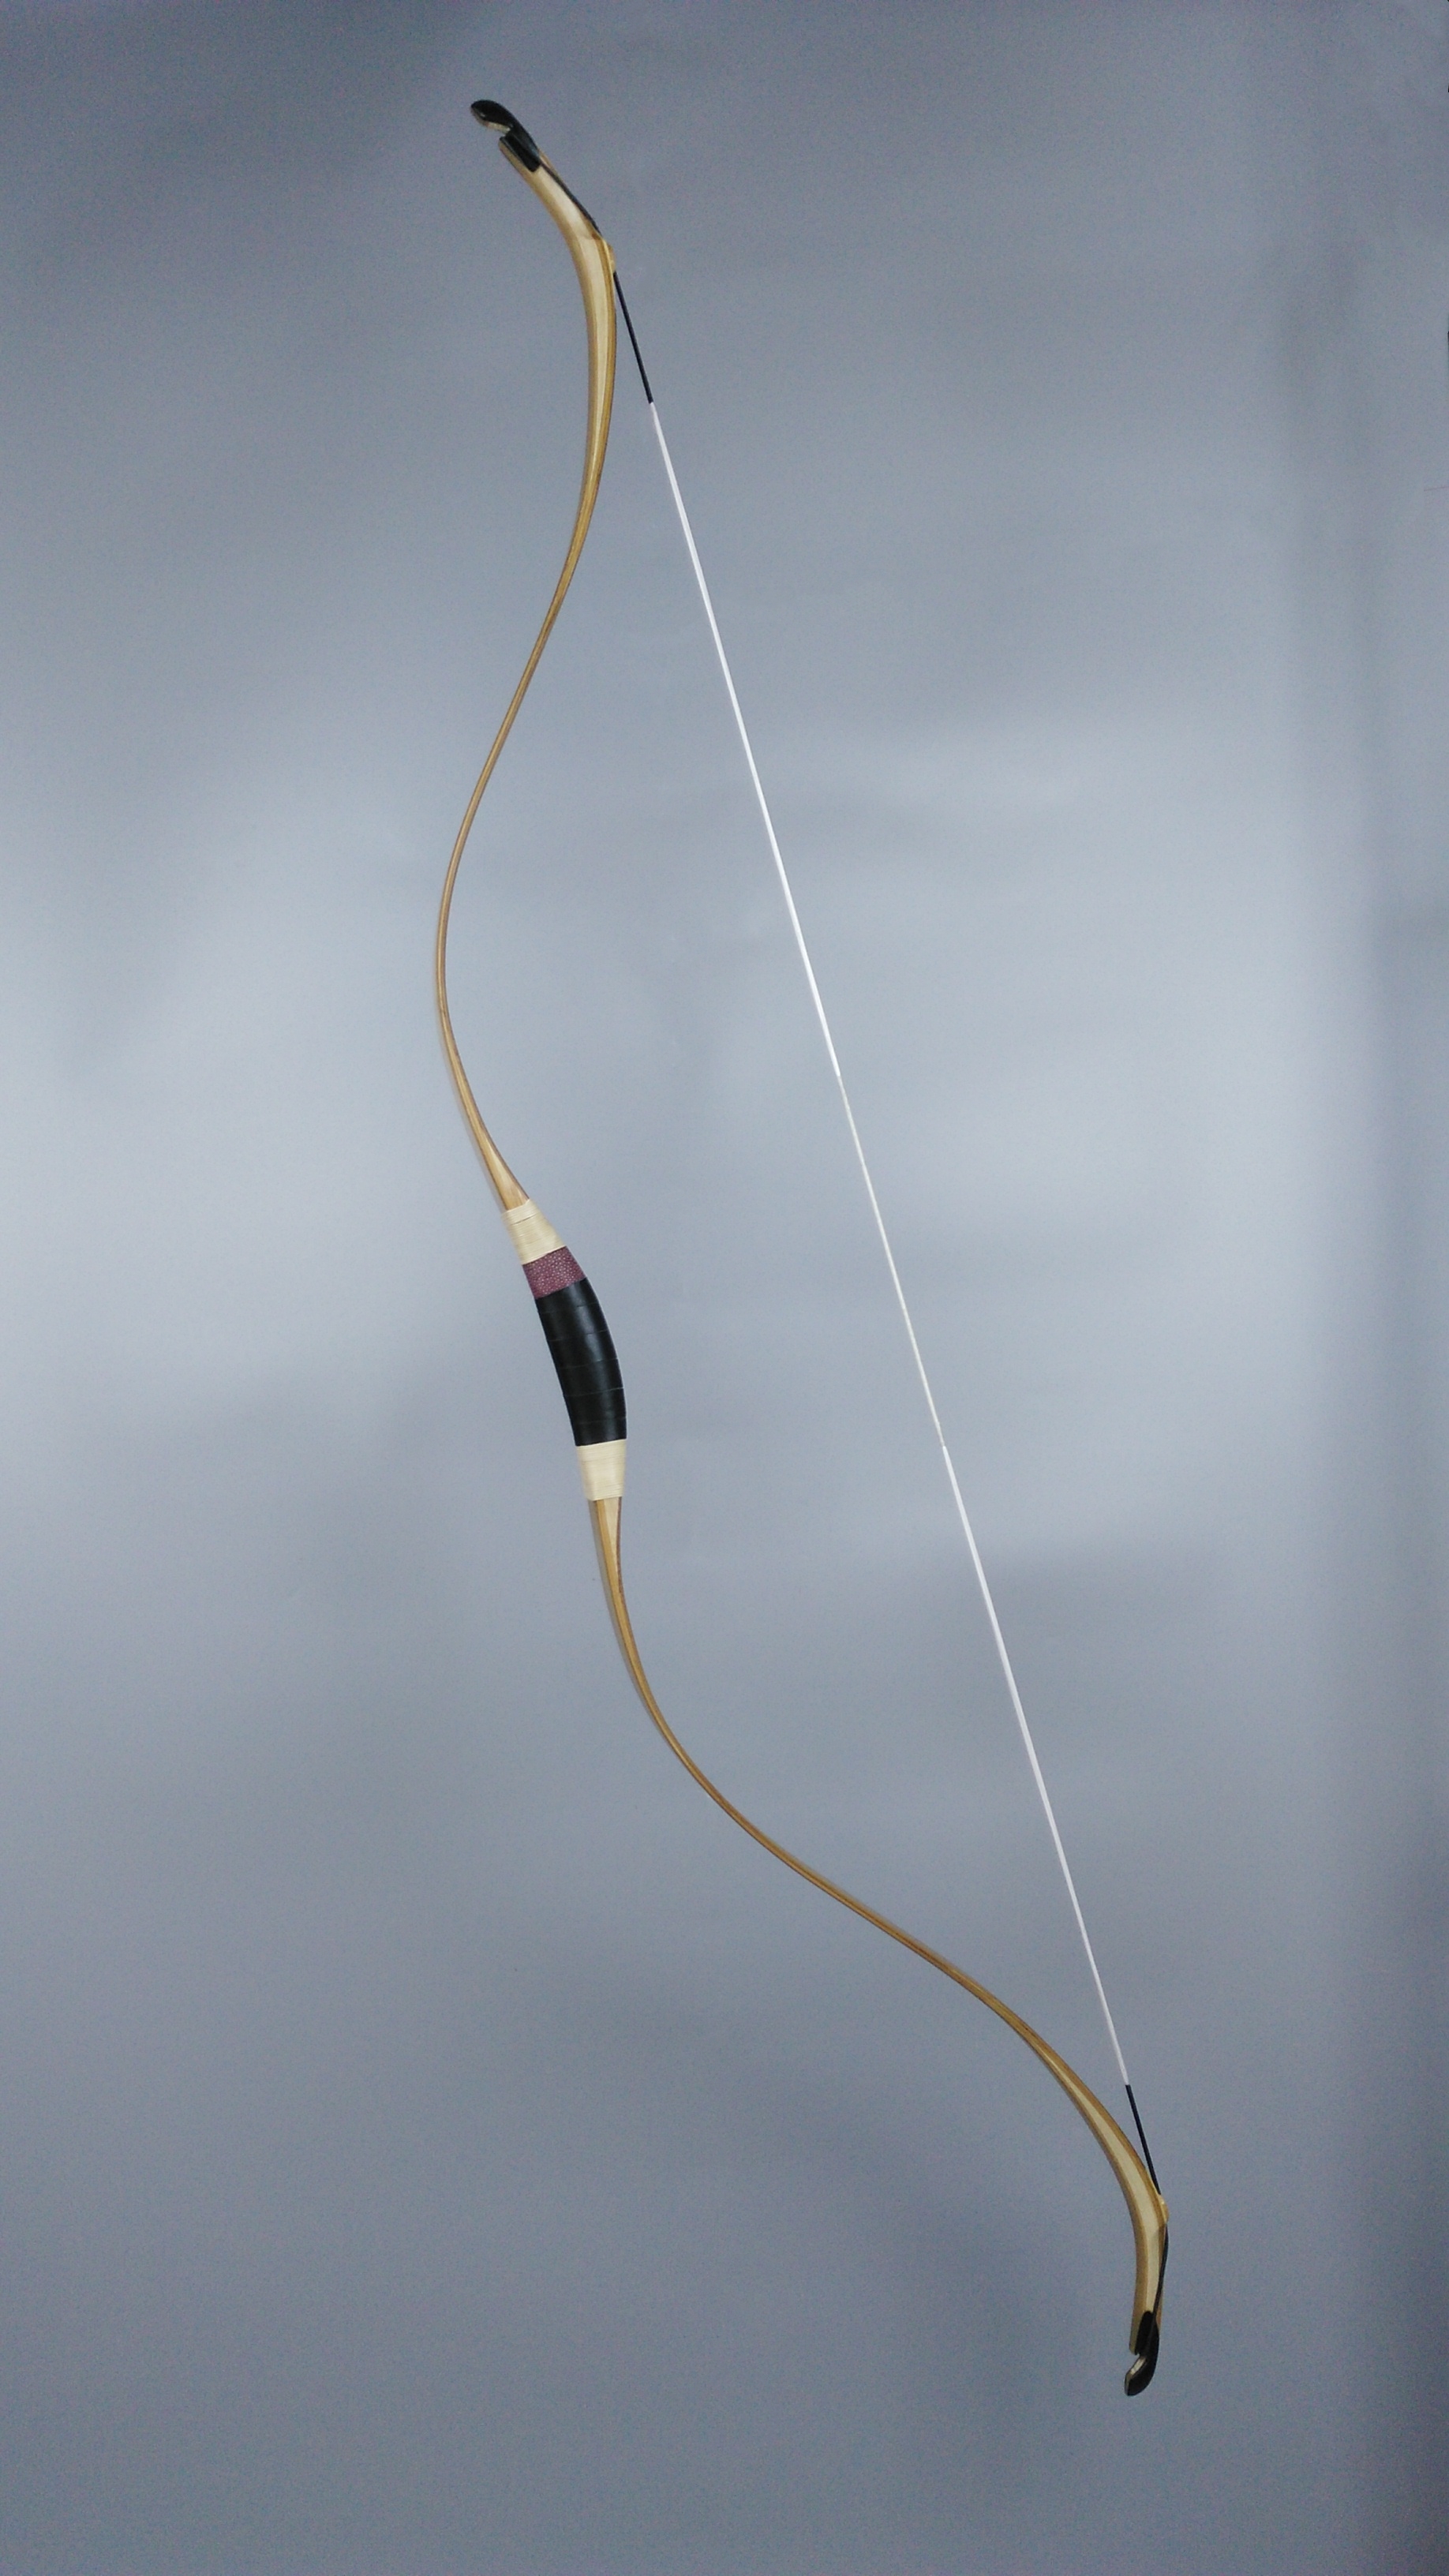
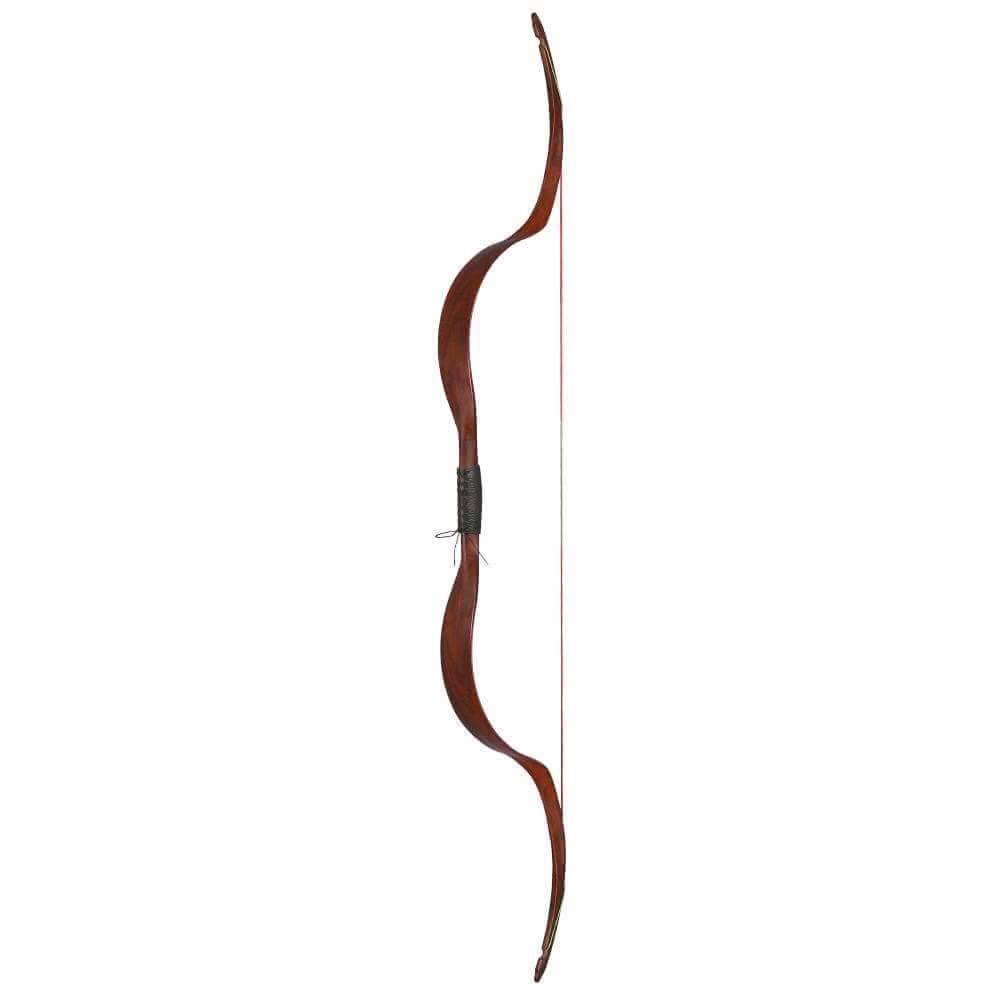
Historical Bows
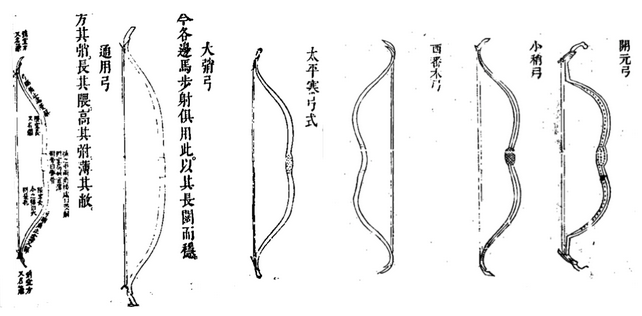
Just a few of the different Ming dynasty (1368--1644 AD) bows. Chinese bows from other eras had different shapes.
Chinese bows are typically static recurves, where rigid "ears" of the bow face away from the archer when unstrung. However, one of the most fun aspects of Chinese archery is that there is no single, archetypal "Chinese" bow design. In fact, various designs became popular over the course of Chinese history. These designs could fall into one of several broad categories [along with their approximate time period]:
- Wood selfbows (old texts mention "mulberry longbows")
- Wood or bamboo composites [Warring States Period through Han Dynasty]
- Simple horn bows [Zhou Dynasty]
- Scythian horn bows [Zhou Dynasty]
- Straight-Ear horn bows [up through Song Dynasty]
- Conquest Mongol horn bows [Yuan Dynasty]
- Small-Ear horn bows (resembling Korean or Crimean-Tatar bows) [Ming Dynasty]
- Large-Ear horn bows (resembling Persian or Indo-Persian bows) [Ming Dynasty]
- Manchu horn bows [Qing Dynasty]
Potentially, there are more types to be discovered. I am looking forward to collecting bows of each style. [For more information, see Stephen Selby's article "The Bows of China" in the Journal of Chinese Martial Studies, Winter 2010 Issue 2.]
Bows You Can Buy
Archery can be an expensive hobby, especially when it comes to buying bows. Bows made from traditional materials (horn, wood/bamboo, sinew, fish bladder glue) can run in the $1500--$3000 range. However, if you're looking for more affordable bows, then here are some ideas on what to get.
The Cinnabar Bow: I am a reseller for different brands of bows suitable for traditional Chinese archery which include: Simon's Bow Company ($650--750), Mariner (in the $295--$440 range), Spearman ($411), Elong (a less expensive option at $95), and others.
Please visit The Cinnabar Bow for more details on how to order.
If this is your first time shooting with the thumb draw, please do not start with a bow that is too heavy or you risk injuring yourself before you have a chance to get used to the technique. As the tutorial video recommends, start with bow that is 35# or under. Some people recommend starting with a cheap, light fiberglass bow from a sporting goods store before spending money on a more substantial bow.
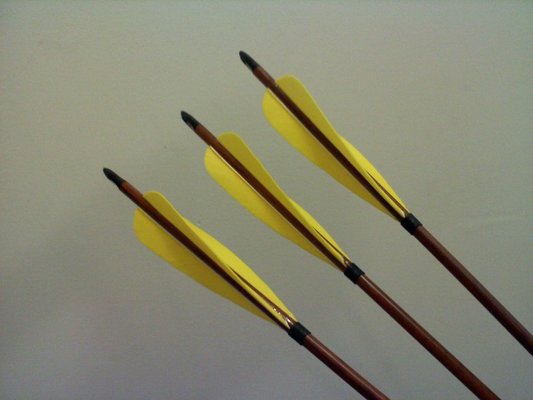
Arrows
Because the traditional Chinese technique entails shooting without a shelf, there are several criteria you want to keep in mind while selecting your arrows.
For shaft material, I recommend bamboo, carbon or aluminum. Wood arrows (e.g., cedar or spruce) are tricky because they might be brittle, may not be straight, or may chafe and splinter during use --- this can be especially dangerous since you are resting the arrow on your bare hand. Make sure you buy from a quality supplier if you get wood arrows.
For aluminum, Easton Gamegetter shafts are an inexpensive and reliable option. For carbon, Gold Tip Traditional Hunter shafts are also affordable and reliable. Carbon Express Heritage arrows are a good option for carbon as well. You can consult the manufacturer's spine charts to give you an idea of what spine to get. Release technique may vary individual to individual, so you may require a slightly stiffer spine or a slightly more flexible spine. The best way to find out is to prepare a small test kit of arrows with different spines but the same mass.
For fletching, I recommend feathers. Traditional Chinese arrows used long, low-profile fletching (no taller than the thickness of the shaft). Since I do not use custom fletch cutters, I typically order 4" or 5" parabolic feathers. If the front tip of the fletching feels hard and plastic-like (due to a flaw in the manufacturing process), you may want to use a file to rub it down or cover it with a dab of a thick viscous glue such as Duco Cement (so it is less likely to slice your hand during a shot). I have not shot arrows with plastic vanes, as I am uncertain whether the semi-rigid plastic would injure the hand.
For nocks, using plastic is fine. Using self-nocked arrows is more traditional.
For the arrowhead, field points or target points work fine (I have even seen people using used bullet shells as arrow points). The vast majority of public ranges do not allow broadheads.
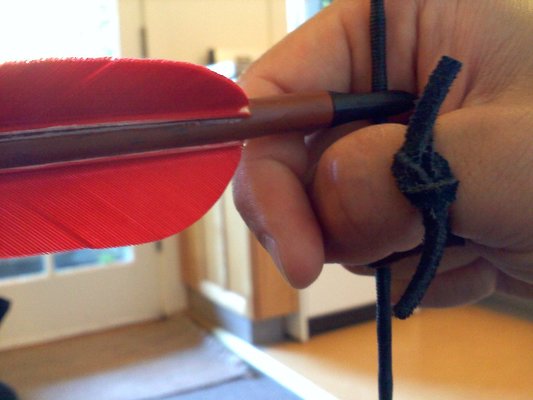
Thumb Protection
-
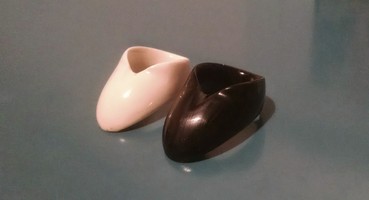
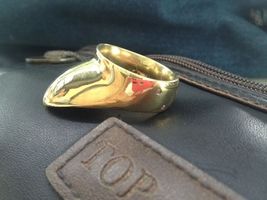
Rings
A properly designed thumb ring will relieve pressure from the thumb better than a leather thumb tab/guard. The trick is to make sure string is sitting just outside the opening of the ring, or between the lip and the string guard (if there is one). The sides of your thumb joint and your thumb pad support the weight, and the amount of pressure the string applies to your skin should be close to zero.
Rings made by Vermil Archery are available in various sizes and are available for sale at The Cinnabar Bow. Please visit the Rings page for details.
-
Leather Thumb Guards
If you prefer using leather, you can construct a folded leather thumb guard. See the Picasa album below for instructions.

How to Make a Leather Thumb Guard
Optional Accessories
You don't need a protective bow glove or arm guard if you are holding your bow hand in the correct way. But if you are just starting out, having such protection may not be a bad idea.
Putting a nock point indicator on the bow string will certainly help with your consistency. Although historical documentation about nock point indicators is scarce, this illustration does suggest that either a nocking point or a thickened center serving was used. With or without an indicator on the string, you'll want the arrow to be perpendicular or pointing slightly downward when nocked --- you don't want the arrow pointing upward when nocked.
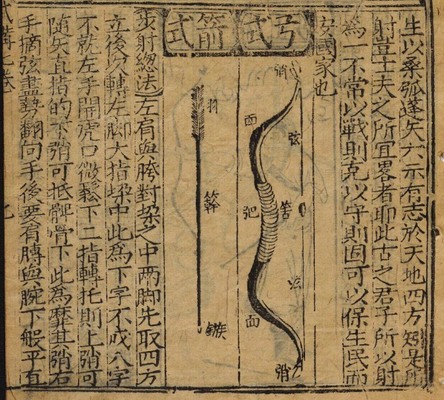
The 筈 (kuo4) was either a nock point indicator or a thickened serving at the center of the string.